Feather Making
by Larry Clark and Scott Grey
1.
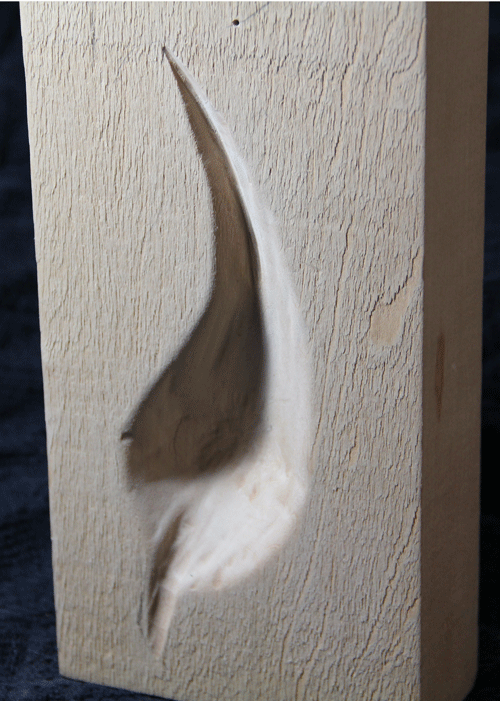
Start with Tupelo or Tupelo Gum
wood saw as thin as you can 1/32 -1/16th of an inch thick then
sand it down till you can see light through it.
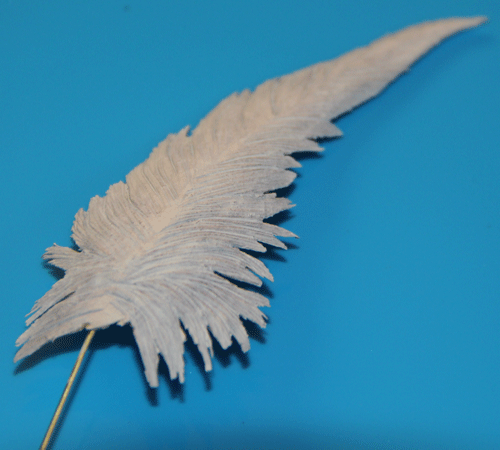
3.
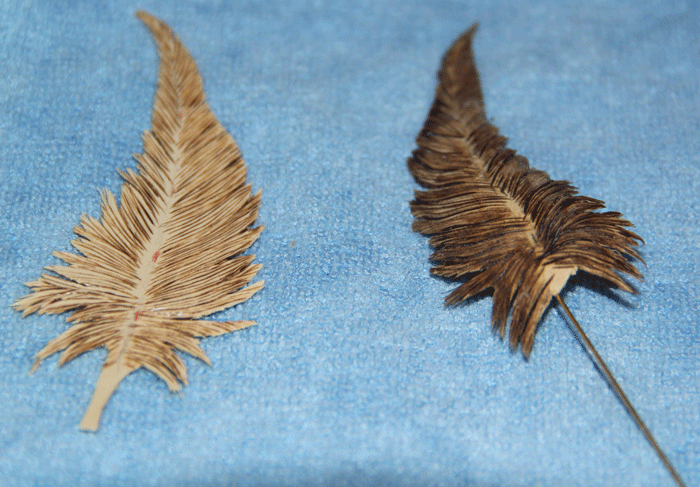
Woodburn the barbs in, use low heat about 2.5 – 3 on adjustable dial on
woodburner adjust as needed. Brown (Not Dark Black)
4.
Soak feather in a bowl of water for 15 -20 min. Then place into the mold to
shape. Press it down & hold it down with small blocks of wood & rubber
bands. Then place it into the micro wave on high for 30 -35 sec. if needed
add 10 more seconds. Take out of mold it is now in the shape you want.
5.
Lightly paint both sides of the feather with super glue. This will help
strengthen the feather.
6.
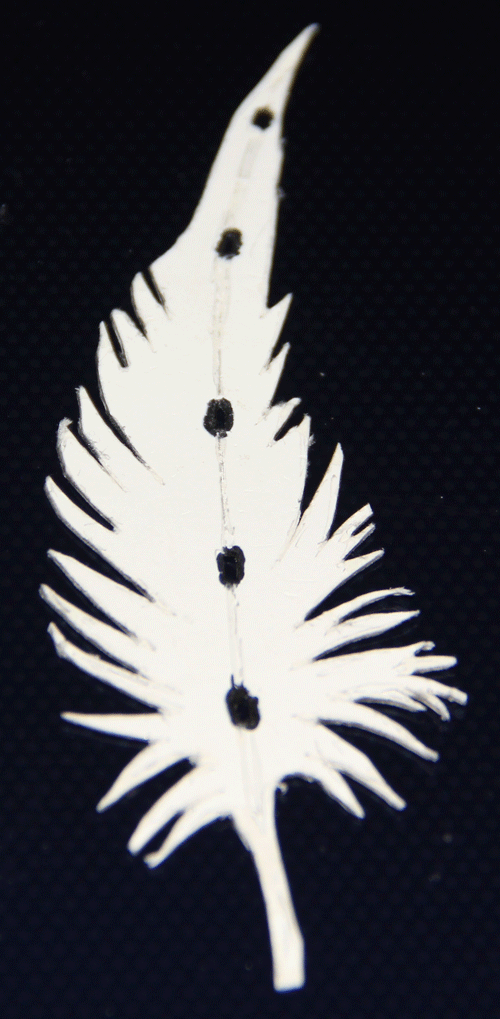
Take 1/32 diameter (.032) brass rod 4 inches long sharpen one end. Place in
in your mold so the sharp end is about where the 3rd mark up from
the bottom would be and press into shape. Then carefully lay it into the
backside of feather and keep shaping till it fit feather. Cut off the excess
wood stem.
7.
Now place brass rod sharp end at the 3rd mark up from the bottom
& put a drop of super glue & hold till set, then put a drop of super glue at
bottom of feather & hold till set. After set & dried mix some 5 min. epoxy
and put between the two super glued spot along each side of brass rod.
8.
Now take some white gesso add water to make a wash. Paint both side with as
many as needed to seal wood.
9.
Now it is time to paint your feather. When done spray a light coat of clear
poly matte. Then cut off brass rod so 7/8 -1 inch from the bottom of feather
is sticking out. Now drill 1/32 hole in a mounting ¼ inch deep & put brass
quill in hole.

10.
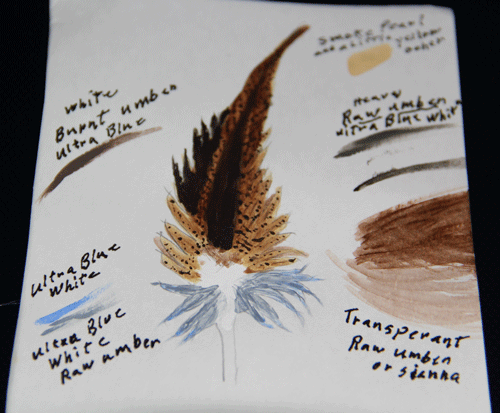
Here is an idea of paint color mix, adjust to suit.